Making cookies is fun. Making thousands of cookies while living in an apartment is logistically difficult.
The freezer is your best bet, unless you are an actual baker by profession and have an industrial kitchen and lots of time. I looked for cookies that could be either baked and frozen, or doughs that could be rolled into logs, frozen, and then sliced and baked the day before. The goal here is to avoid getting stuck shaping cookies (even drop cookies take time) in the midst of pre-wedding madness.
I made an Excel spreadsheet for myself (UPDATE - I finally have the spreadsheet information up and you can see it here - http://heart-of-light.blogspot.com/2010/08/cookie-spreadsheet-expla...), listing all the recipes I was going to use, and the number of batches of each, and then had it calculate the total pounds of flour, butter, etc. I needed to buy. I did one or two major shopping trips at Smart and Final and bought supplies in bulk. Knowing my entire list ahead of time saved time and money.
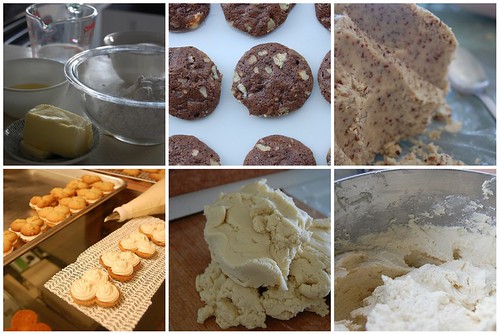
I made one or two different types of cookies per week, mixing up two double batches of each to save time, for the month and a half prior to the wedding. Of course, this meant our entire freezer (and my parents' entire freezer) was filled with cookies and cookie dough.
A few days before the wedding, I made hundreds of mini cupcakes. I cheated and used boxed mix that I picked up when it was on sale for $1 a box but I did make real frosting. The easy way to dole out cupcake batter? Get a gallon size ziploc bag, scrape the entire bowl of batter into it, seal the bag, cut a small bit of one of the corners out and then just use it to neatly dispense cupcake batter into the cups. You wouldn't believe how much time this saves, compared to spooning batter into each cup. You get approximately 75 mini cupcakes per box of cake mix, which makes these really cost effective.

Tips for doing a massive dessert buffet:
1. Unless you are a control freak (I freely admit I have a problem), please get other people to help. I've heard that in the midwest, cookie buffets are a wedding tradition, with family members bringing cookies to share. I think this is a great idea, if you provide the plating set up.
2. Tables look better with lots of height layers. I used my own stash of vintage cake platters and borrowed stands from people, trying to make sure we ended up with a variety of heights. I also bought (from a flower supplier) inexpensive hurricane vases in various sizes, to add a little contrast.
3. Buy little bags or boxes. We had tons of leftovers at the end of the night, and we set out little brown lunch bags, so that people could pack up cookies to take home.
4. Get someone to take pictures! I am still so sad that we don't have any good pictures of the tables, because they were really pretty when they were all set up.
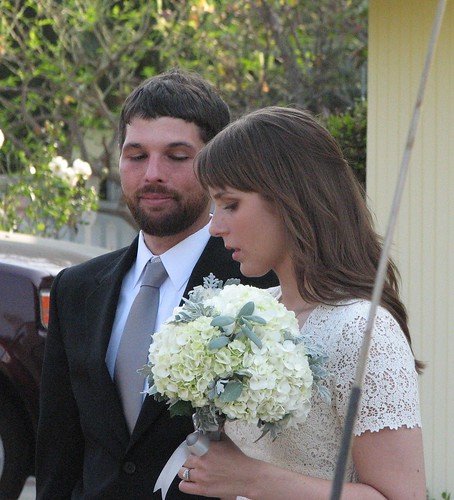
Location: The ceremony was held in a little chapel up the street from the groom's parents' home (the one my sister always wanted to get married in). We all grew up in the same neighborhood, so it was a mere mile from my parents' house, making logistics much easier. The reception was held in the groom's parents' (thankfully large) backyard.
We rented tables and plain white tablecloths from a local rental company. A florist friend helped us pick out flowers (vast amounts of white hydrangeas, with dusty miller and other accents plucked from my mom's yard) and make simple clusters of them in low vases for the tables. Between the vases, we spread trails of glossy black river rocks (from Home Depot).

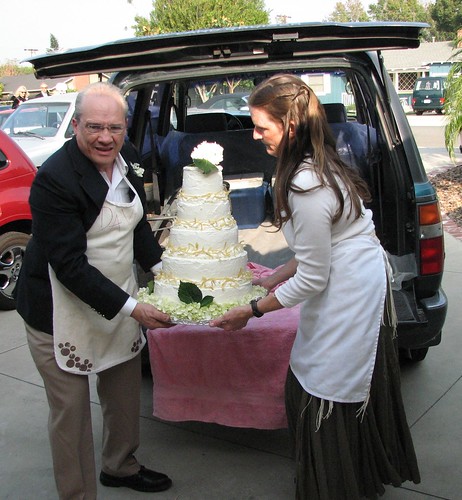
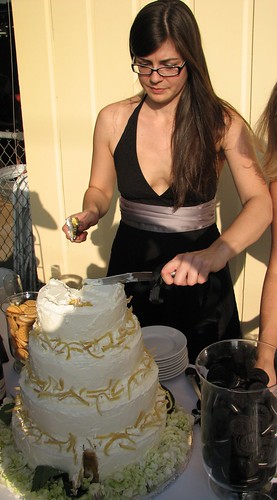
 Photo from Martha Stewart Weddings, found here.
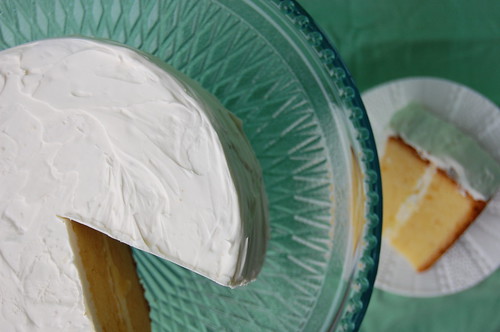
Things to think about, if you want to make a giant wedding cake:
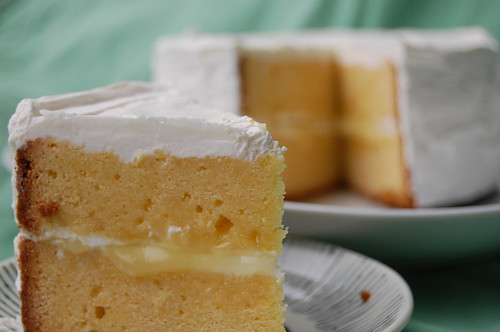
1. Pick a recipe you are comfortable with - I highly recommend pound cake if you aren't experienced with making large cakes, because airier cakes are more likely to crack and cause major frustration.
2. Go to a cake store well in advance, because you are going to need large pans (some cake stores will rent pans to you for a fraction of the cost of buying them) and specialty ingredients.
3. Don't rely on your decorating skills too much, unless you are actually a cake decorator. This cake was a dream because I just slathered the frosting on for an amazing, stucco-esque finish and then added some candied lemon peels and flowers for decoration.
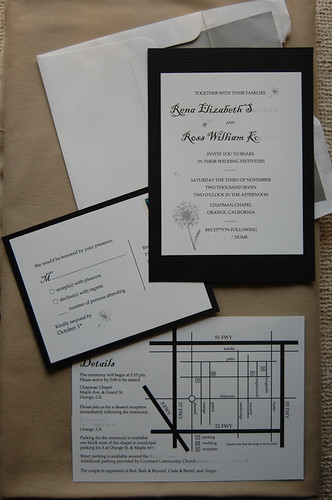
The invitations: On a tight budget, letterpress simply wasn't an option, so we decided to go super simple instead. I designed the invitations to maximize efficient use of paper and shopped around online for envelopes.
I designed the invitations in Illustrator and printed them on nicely textured white paper, four to a page. An ink jet printer works just fine, especially if you set the print quality to "best." A thick black paper with lightly embossed columns provided the backing, and I added a couple tiny rhinestones to the fly aways because I am a sucker for sparkles.
The RSVP cards were very similar, but I backed them on thick black cardstock, so that they would hold up to the mailing process. D designed a super simple map for the details card.
1. Try to maximize everything - I started with common paper sizes and then figured out what size to make the final invitations.
2. Research postal rules. We originally thought square invitations sounded fun, but oddly sized envelopes mean extra postage, which adds up quickly. We made the postcard RSVPs, which saves money on postage, but they have minimum and maximum sizes.
3. Invest in a paper cutter and some spare blades - trust me, you cannot do this with scissors.
4. Spray adhesive is a million times less messy than actual glue. We would lay several invitations out face down on a large piece of cardboard, spray them all (outside!) and then quickly lay them down on the backing.
5. Buy a test sheet of paper and print the invite on it before you commit to a bulk quantity. I made the mistake of not doing this and ended up with two unusable reams of paper, because the texture was just too smooth and I couldn't live with it.
*** BUDGET BREAKDOWN: ***
Approximately 125 people attended. I'm always curious about how these things break down, so here's what we spent.
Rentals: $917 (included tables, linens, chairs, coffee cups + saucers, champagne glasses, plates, forks, delivery charge and tax)
Food: $400 (includes ingredients for thousands of home made cookies, plus all the stuff for making the cake, including cake pans)
Drink: $450 (we ordered 70 bottles of decent champagne ($7.50 per bottle) at BevMo. They have great prices and they allow you to return unopened bottles, which was great because we ended up only using 60 bottles)
Flowers, etc: $250 (for bulk hydrangeas, plus buying the vases, the ribbon for the bouquets and the river rocks)
Invitations: $300 (including invitation, inserts, envelopes and postage for 150 invites. We designed our own invitations, shopped around for nice paper, and printed them on our printer - this would have been even cheaper if I had more experience, because I messed up a few times and bought stuff we didn't need)
Dress: $200, plus another $50 for the material for the flower girl skirts, my cummerbund, and the boys' ties, all made by mom. Oh, and $50 for an adorable pair of black Mary Janes that went perfectly with the sweet little wedding dress.
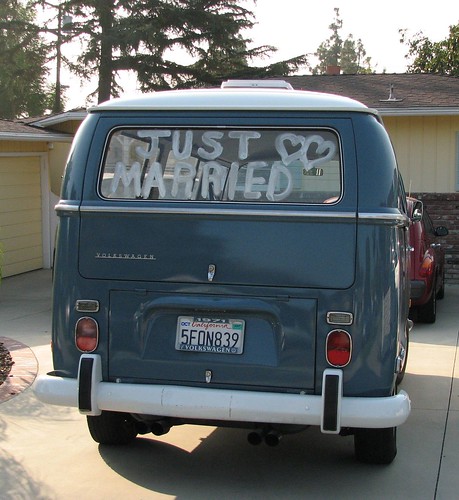
Of course, we did all the work ourselves, so I don't really know how to come up with a cost for that. I loved planning this wedding, but it convinced me that wedding planners more than earn their money. This took major planning, thinking ahead, researching, dozens of my nerdy organizational spreadsheets, plus a scale drawing of the backyard layout in AutoCad. We had three families and innumerable friends helping out, which was amazing, and fun, and more than a little crazy. Everything was simple and a true labor of love. No one seemed to mind not having plated service or a wedding band. We forgot to toss the bouquet. No one cared. After we saw off the happy couple (they camped out on the beach for their honeymoon), lots of people stayed to help clean up a bit and someone ran out and ordered massive amounts of In'n'Out burgers and fries and we all sprawled around and finished off more champagne.
Views: 84
Write a Review or Comment
© 2025 Created by Christine Dyer.
Powered by
![]()
You need to be a member of BridalTweet Wedding Forum & Vendor Directory to add comments!
Join BridalTweet Wedding Forum & Vendor Directory